
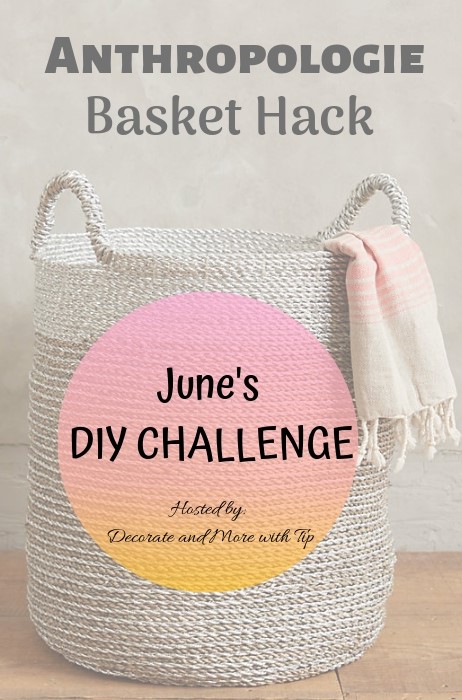
Welcome! It is the first Wednesday of the month, time for our DIY Challenge. For our inspiration this month we chose a basket from Anthropologie, the Sun Stream basket. I just love the basket with the two tone look, but the price…..OUCH! I thought this is something we could make for the DIY challenge, how hard could it be? Well…. let me say, it wasn’t as easy as I thought. You can ask my friends doing the challenge with me. It is harder than it seems. We took the challenge and stuck with it until we finished our baskets. I will have all my friend’s DIY blog post linked at the end of my page. I am so excited to see all the different styles they came up with myself. First, I want to share my basket and how I made it.
This post may contain affiliate links. Click {{HERE}} for full disclosure.
I was so excited I couldn’t wait to start making my basket. I had great success making the form. THEN…I started wrapping the basket, here comes the trouble. I first started with straw cording but the cord was way to small and the hot glue was getting a bit messy, so I scratched that. Went to Plan B and grabbed my Dollar Tree nautical rope. That worked better but I ran out. I went to three Dollar Tree stores in my area and not one of the stores had it in stock. I ran to Walmart and grabbed a roll of their jute rope. Came home and the rope from Walmart was smaller than the Dollar Tree rope. UGH I pulled all the Dollar Tree rope off of my form, cleaned up the rope and went with Plan C. Finally a plan that worked. Seriously!

So here we go! I hope you enjoy my tutorial of making my Athropologie basket hack.
Here are the items I used for my basket.
- 6 Dollar Tree nautical rope bundles
- A bundle of Walmart Jute rope
- A lot of hot glue sticks. I used a total of 9 of the full size sticks
- cardboard box
- packaging tape or any heavy duty tape
- scissors
- paint – I used Statue Green by Kilz Tribute

SHOP MATERIAL HERE


MAKING THE FORM
I broke down the cardboard box and cut to the size of ll inches in width and the length to make a cylinder of 11 inches in diameter. Rolling the piece of cardboard to make a curvature shape.

")
I used packaging tape to connect the two ends together.
")
")
To make the bottom of the form I took a piece of flat cardboard and placed the cylinder on top and traced around the cylinder.
")
")
Cut the circle out, hot glue it to the cylinder and cut the excess off.

")
")
")
I added some packaging tape to the edge of the bottom of my form.

To reinforce the bottom I applied a good amount of hot glue inside the bottom edge.

This will be the form for my basket.

Like the inspiration basket I wanted mine to be two tone also. I am going to take half of the bundle of the Walmart jute rope soaking it in paint and let dry.
COLOR ROPE PREPARATION
I took 1 cup of paint & 1 cup of water and pour both in a tub. Mixing the two together, I placed the rope in the paint pushing the rope down until it was covered in paint. I let that sit for 5 minutes.
")
")
")
I squeezed all the paint out of the rope and placed it as straight as I could get it on a piece of plastic until it was dry.
")
")
WRAPPING THE ROPE
Turning the cardboard form upside down I placed a glob of hot glue in the center.

I curled the end of the Dollar Tree rope a couple times making sure the curl is larger than the glob of glue I placed on the bottom of the form.

I added a stream of glue and kept wrapping the rope around the middle curl.

To apply the glue and rope without the glue oozing out, I applied the glue in a stream away from the area placing the working rope on top of the glue without pushing it into the curled rope.
")
")
I continued to wrap until I got to the edge of the bottom.

I turned the form over, wrap one more time around and cut the rope off.
")
")
")
Making one more row with the Dollar Tree rope cutting the excess rope off.

Taking the unpainted Walmart jute rope and adding a piece between the first and second row of the Dollar Tree rope. This will connect the space from the bottom and first side row.
")
")
Now starting the rows. Alternating the painted jute rope and the Dollar Tree rope. I always started my rows at the same place.
")
")
")
When I had 4 inches left at the top I stopped wrapping. I painted the unwrapped area and the inside of my form with the same paint as I painted the rope.
Using just the painted rope I wrapped 3 inches. I left 1 inches from the top unwrapped.
")
")
")
Take a piece of the Dollar Tree rope and I placed a piece down the side of the basket hiding the seams. I placed another piece on the other side of the basket to make it match.

MAKING THE TRIM AND HANDLES
I cut six 60 inch stripes with the Walmart jute rope, lined the pieces in a row and taped on the floor with painters tape, double up the strands and started to braid.
")
")
")
I hot glued the ends so they won’t unravel.

I glued the braid around the top edge that I left unwrapped, cutting and gluing the ends together.

I took two 6 inches pieces of the braid trim and attached it with glue to the top sides of the basket centering them with the side trim piece I placed to hide the seam.

I took the rest of the trim and glued on the top edge making sure not to glue down the section where I placed the 6 inch trim pieces. Doing that created the handles.

Last step, I heard that when working with jute or the Dollar Tree rope take a lighter and burn the wild threads to make a clean look. It really does work. How cool is that?


What seems like a lot of steps really didn’t take as much time as you think. After I worked out Plan C it wasn’t that long before I was finished. I love my rope basket, what do you think?


⇓ PIN THIS ⇓

If you like my blog be sure to click on the LIKE button and SHARE it with your friends! It’s the best way for my blog to grow. I would love for you to be part of my family so sign up to receive my emails. Every time I post a blog I will send you an update email. Also, follow me on Facebook HERE, Instagram HERE, Pinterest HERE and Bloglovin’ HERE. Come by and say Hey!
♥ Terrie
Now be sure to check out my friend’s Anthropologie inspirational baskets.


Decorate and More with Tip ¦ Pandora’s box ¦LeCultivateur


This Full Life 5 ¦K’s Olympic Nest¦Barnhousemess


Uncommon Designs¦Savvy in the Suburbs¦Chasing Quaintness


Sweet Southern Grace¦Bluesky at Home¦Through a Vintage Door

- Terrie over at Decorate and More with Tip
- Patti over at Pandora’s box
- Emily over at LeCultivateur
- Dori over at This Full Life 5
- Kelli over at K’s Olympic Nest
- Danya over at Barnhousemess
- Trish over at Uncommon Designs
- Sheri over at Savvy in the Suburbs
- Benita over at Chasing Quaintness
- Shae over at Sweet Southern Grace
- Carol over at Bluesky at Home
- Teresa over at Through a Vintage Door
- Jessica over at Jessica Simmons
Decorating our home on a budget is my thrill. I think a home can look beautiful without breaking the bank. Your home should bring the best out of you and make you feel happy. You should smile every time you enter your home. 🙂
The basket turned out great! What a neat idea.
Thanks Tara. This DIY challenge was more difficult than I would of thought. It was so much fun working with the girls on this challenge. We all stuck it out and finished with some beautiful baskets.
Terrie, this basket turned out so great! So much more involved than mine! You are definitely the crafter extraordinnaire!
Sheri, I think all of our baskets turned out great. Your basket looks awesome. Thank you for your sweet comment. Thanks for joining the challenge. Can’t wait for the next one!
Terrie, your basket turned out amazing!! I love that you used two colors! So cute!! Thank you for putting this challenge together for us!! It was so much fun!!
-Emily
Thank you Emily. It was a challenge indeed. I am so happy how it turned out and am looking forward to another challenge. Hope you have a great week.
Terrie your basket is AMAZING!! It looks just like the Anthropologie basket!! I love the two colors and the burn affect. Beautiful.
Thank you so much Dori! I had such a great time working on this challenge with you. It was a challenge wasn’t it?
Your basket turned out AMAZING Terrie 🙂
Thank you so much. It really was a challenge but so happy I pushed myself to find what works. It works perfect for what I want it for.
All I can say is wow! This is just awesome Terrie I love this !
Mine looks nothing like everyone’s else’s but I still had fun joining in. Your talent is amazing !!
Teresa
Thank you Teresa! I saw your DIY Basket and girl it looks awesome in your bathroom. I LOVE it! That’s the cool thing about DIYs it doesn’t look like anything anyone else made….it’s yours! Thanks for joining in on this challenge. I hope to see you next month!
I can’t believe you made a basket! That is truly outstanding and it looks great in your home.
Thank you Kim. I love a DIY and this challenge was a lot of fun. If you like DIYs let me know we can always use more DIYers on our next challenge.
Terrie, I’m so impressed with your woven basket and how you made it. Love the blue and white combination and the braided trim at the top. Making the form, dying the rope, making a 2-toned look ~ wow, girl, you rocked this. Thanks so much for hosting. Since this is my first time on the DIY challenge, I’m going to have to up my game next time.
You don’t have to up your game, I saw your basket Carol. It looks awesome. I hope you join us next month in the DIY Challenge I love having you. Thank you so much for your kind words. I love how all of our baskets turned out!
Oh my gosh! I can’t believe the inside is a card board box. Brilliant! I love how you mixed the two colors and the braided handle. If I was to do this again, I think I would follow your lead because you can really make this work with your home style.
Thank you Kelli. I knew that it would be hard to make the basket without a form and didn’t want to fight to get the form away from the rope so I decided to make a form to keep inside. The box was the only the only thing I had on hand that I could make fit my size. I am happy with how it turned out. And like always if I were to do it over again I would make a couple changes. First would be not stressing. ha! Thanks for joining in on the challenge. It was a lot of fun!
Terrie, I love your basket! You did a fabulous job and the colors are so pretty! I love how you alternated the color throughout the basket…it gives more depth and texture! Great job girl!! I’ve enjoyed this challenge and look forward to next month! Hugs!
Terri great job and what patience you have. I think I would have been frustrated with this challenge.
I will say the finished product is great. I like the contrast in color very much. Perseverance paid off. 👏👏
Cindy