
Hello everyone!
Since I had the staple gun out after I did the coffee table bench I thought today I could do a quick DIY change to my hope chest. I had this hope chest since I was 17 that my parents gave me for Christmas that year. I moved it, painted it, upholstered it, you name it I probably have done it to this special piece of furniture.
Before I got married I did use it for a hope chest, I loaded it up with all my hopes and dreams for my own home some day. Today, it holds my special memories. My children’s christening gowns to their college graduation gowns. It holds my special memories.
I was looking back at my photos and the only full shot I have of my hope chest was back in 2010. The original hope chest had different handles and didn’t have a cushion top.
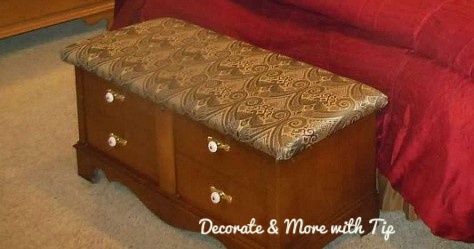
I painted and glazed my chest a year ago and changed the material.

One day when I was in Tuesday Morning I spotted a blanket/throw that I thought would go great in our Master Bedroom. I wanted to change the material of the hope chest with it.
I have already shared how I upholstery the insert panels on the thrift store coffee table. If you missed that you can go HERE to read on how I did that.
Today I wanted to share with you how easy it is to change upholstery on a piece of furniture to make it look new and fresh. This will show you how many times I do this quick DIY. This is very inexpensive and easy to do.
First thing I did was remove the top from the chest and all the layers of material that I had on it. I removed all the stables with pliers and a regular screwdriver. I had several blisters after I finally got all those old staples out.
I had 6 layers of different materials. I needed to remove all those layers. I am not sure if the staples would hit the wood if I didn’t. ha!

Once I removed all the old material I added more batting to the top.


I placed the material pattern side down and the top of the hope chest on the material. I cut the material about 3 inches wider than the top.
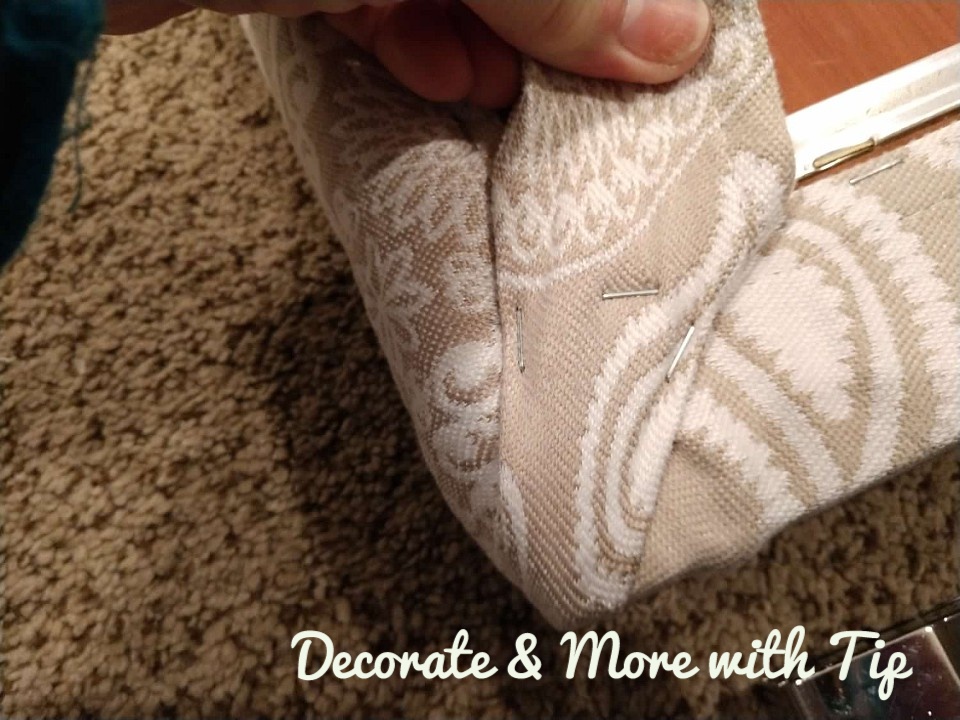
I always start with the first two staples in the middle of each side. Pulling a little tight, but not too tight to where you make an indentation from pulling.

I made sure that my fabric was straight, then I started to stapling.
Remember when it comes to the corners I told you this is a little tricky. I stop stapling when I get to the edge of the corner.

Pull the extra fabric up and over the corner and work out the wrinkles by pulling tight.

Staple the corners.
Cut the excess material off.

I stapled again to secure the fabric one more time. This is what it should look like.

Do that to all four corners.
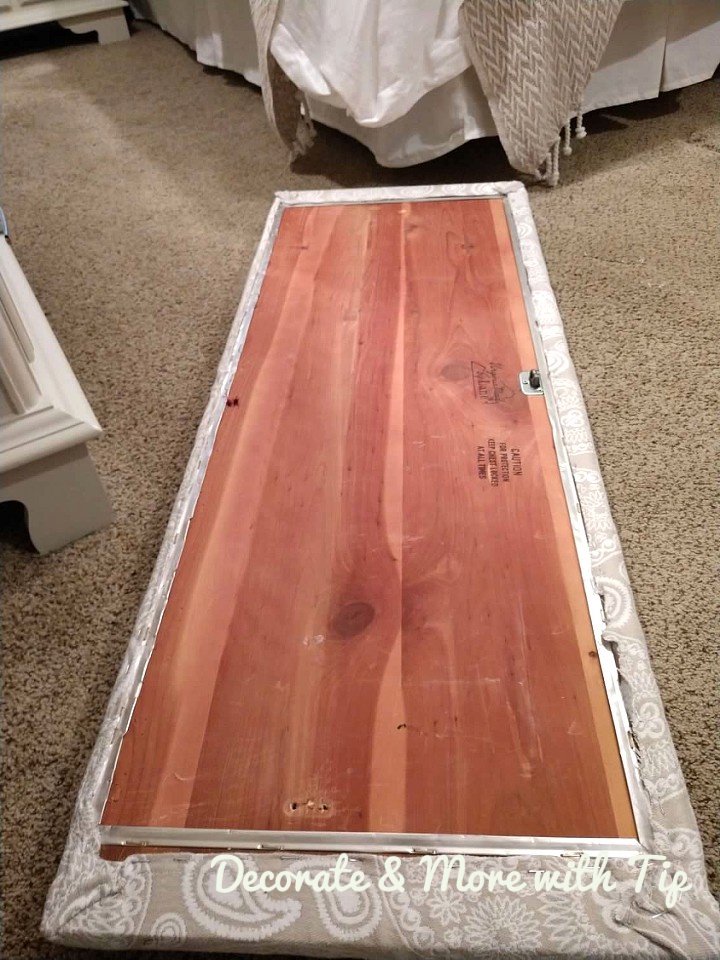
Secure the top to the chest.

Just like that, the project is complete. I love the pattern of the new material on the chest. I am happy with the look. What do you think?


Maybe I inspired you to try to upholstery something in your home.
Thank you for coming over today, hope you will continue to come visit me.
As always follow me on Instagram and Facebook. And jump over on Pinterest and see what all I pin. If you like this blog please click on the LIKE Button! AND if you really like it SHARE it. I would really appreciate that so much!
Stay Strong and Stay Blessed!
XO Terrie
Decorating our home on a budget is my thrill. I think a home can look beautiful without breaking the bank. Your home should bring the best out of you and make you feel happy. You should smile every time you enter your home. 🙂
Good morning , Terrie :
First of all I am glad you all down there are safe from that terrible storm. I had seen on the Weather Channel yesterday a.m. that from Nashville south there were going to be storms. They were even letting out the schools at noon or so. There was a lot of prayers going for yous. Thanks to your neighbors for letting you stay in their storm shelter.
Your hope chest looks BEAUTIFUL. You are amazing !!
Love you so much.